Platform
Solutions
Industries
Compare
Resources
Posted by on October 16, 2025 — Updated on October 16, 2025
With the Exercise.com Point of Sale (POS) feature, you can now add support for Product Variants directly within the POS Configuration Page and POS View. This update allows admins and trainers to manage products that have multiple variants (such as sizes, colors, or package options) from one streamlined interface. During checkout, users can select specific variants for accurate pricing, inventory tracking, and reporting across all transactions.
This tutorial walks you through adding product variants in the POS configuration page to customize your sales interface.
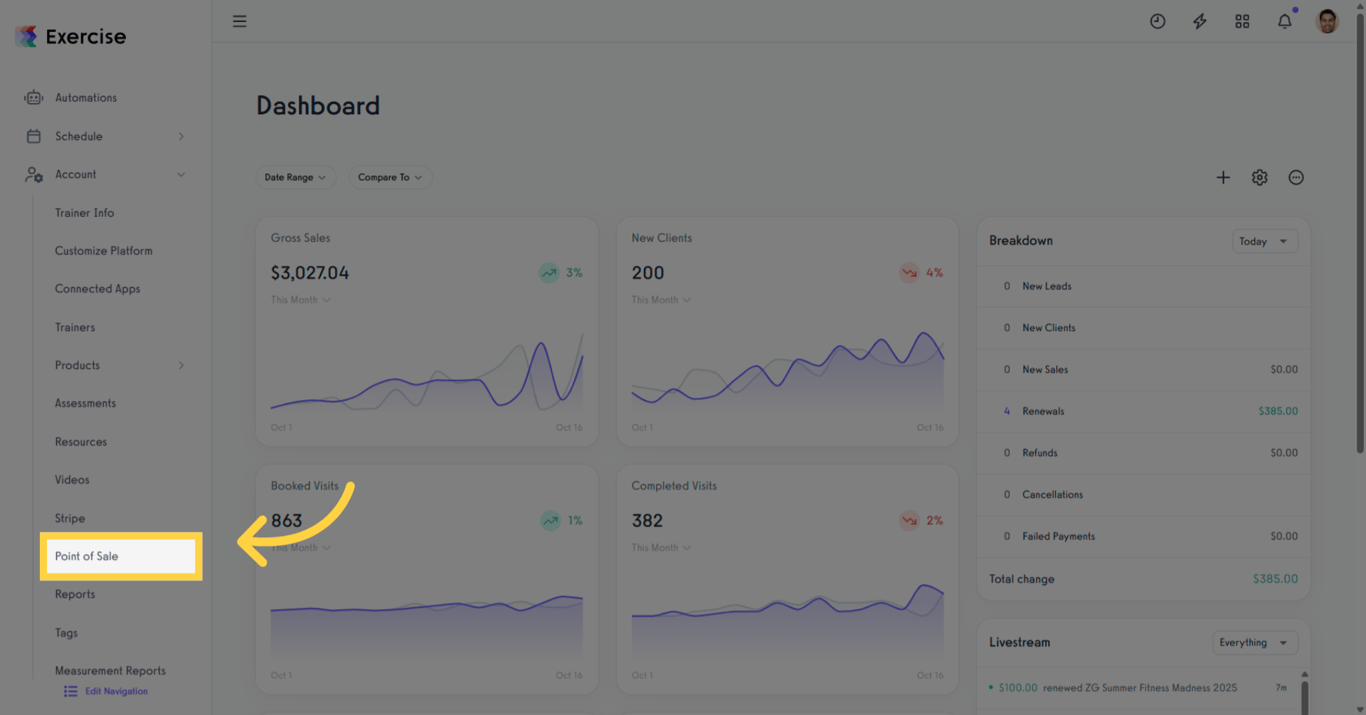
In the Account tab, click Point of Sale to open and manage the main POS interface.
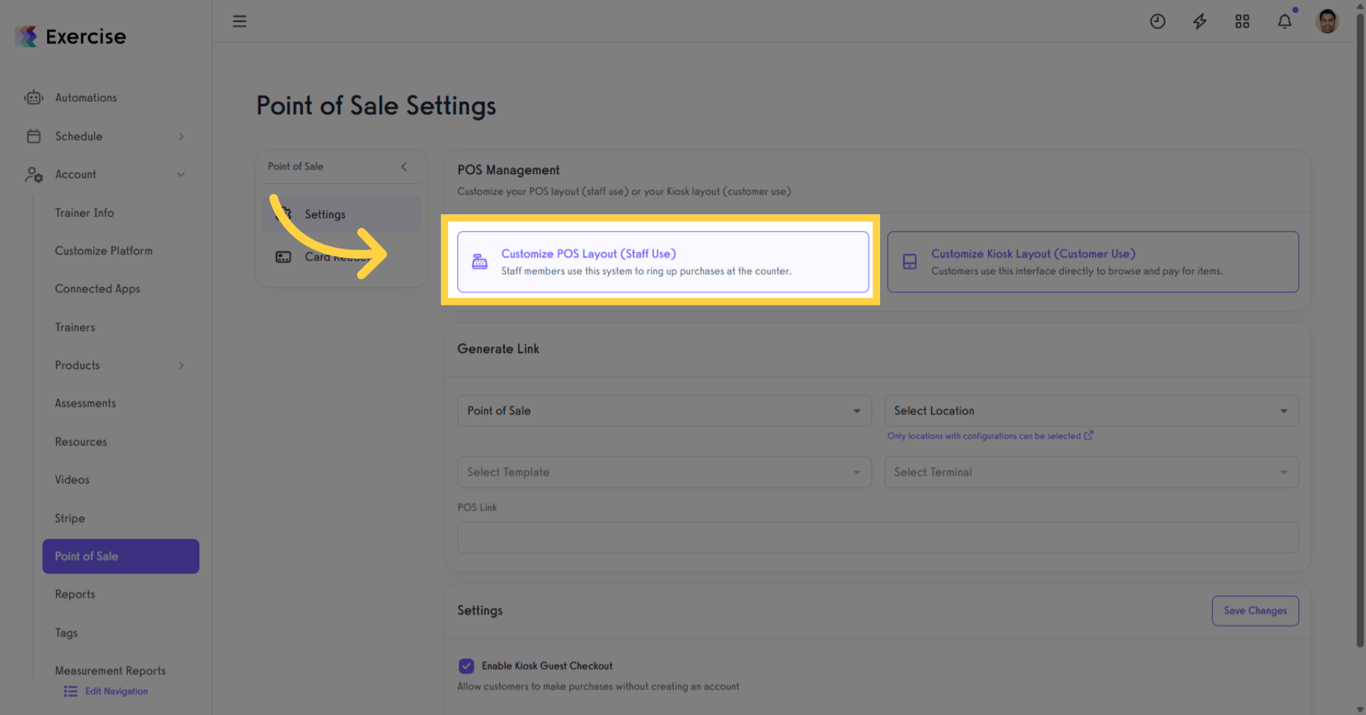
Click Customize POS Layout (Staff Use) to modify the layout that staff use at checkout.
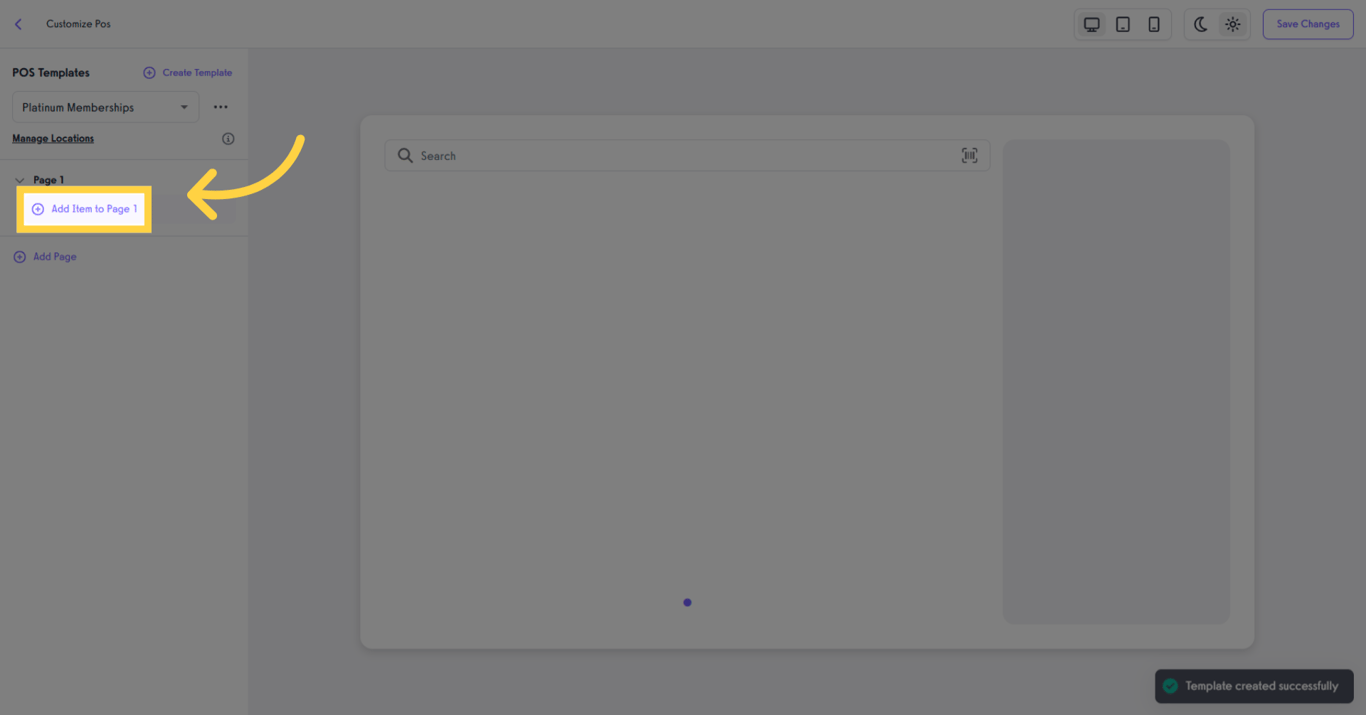
Click Create Template to start a new POS template or use the dropdown to edit an existing template.
Click Change Template to activate and begin using the selected POS template.
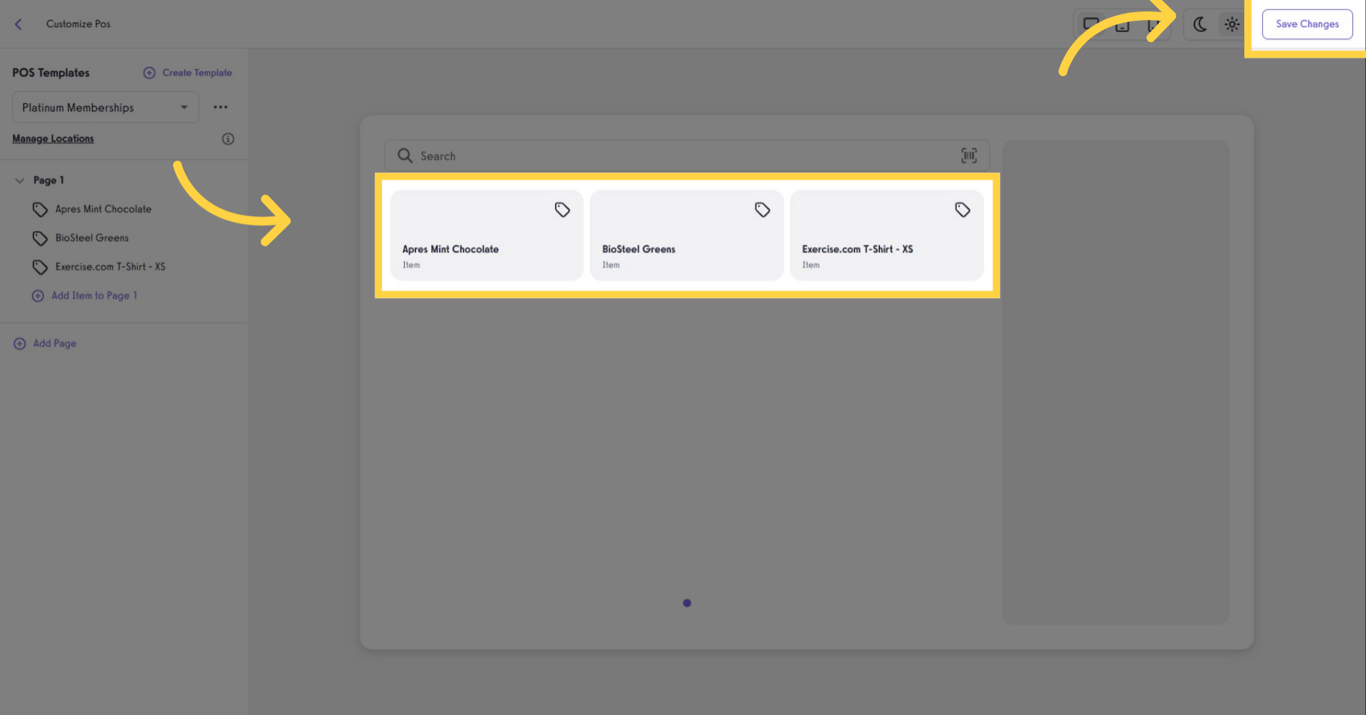
Click Add Page and then Add Item to add products, packages, plans, or groups to your POS layout.
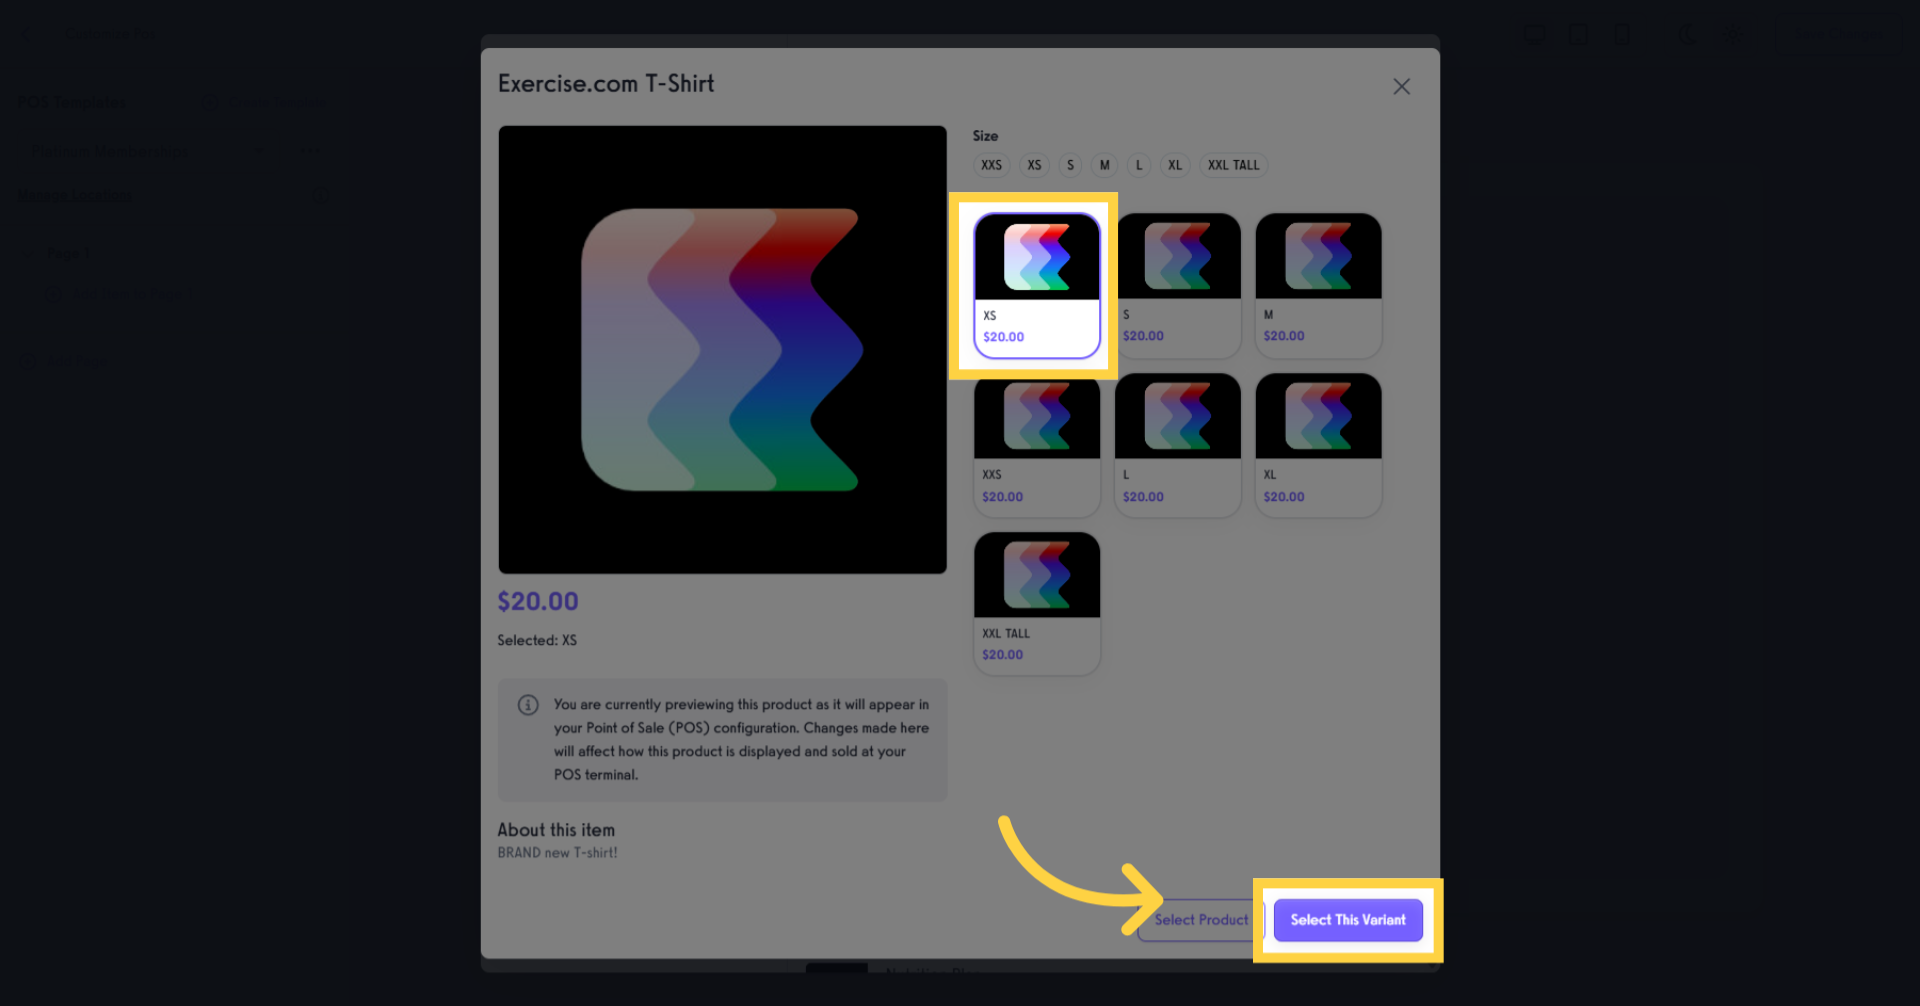
Open Products, select a product, then choose a specific variant (for example, size or color) and click Select This Variant.
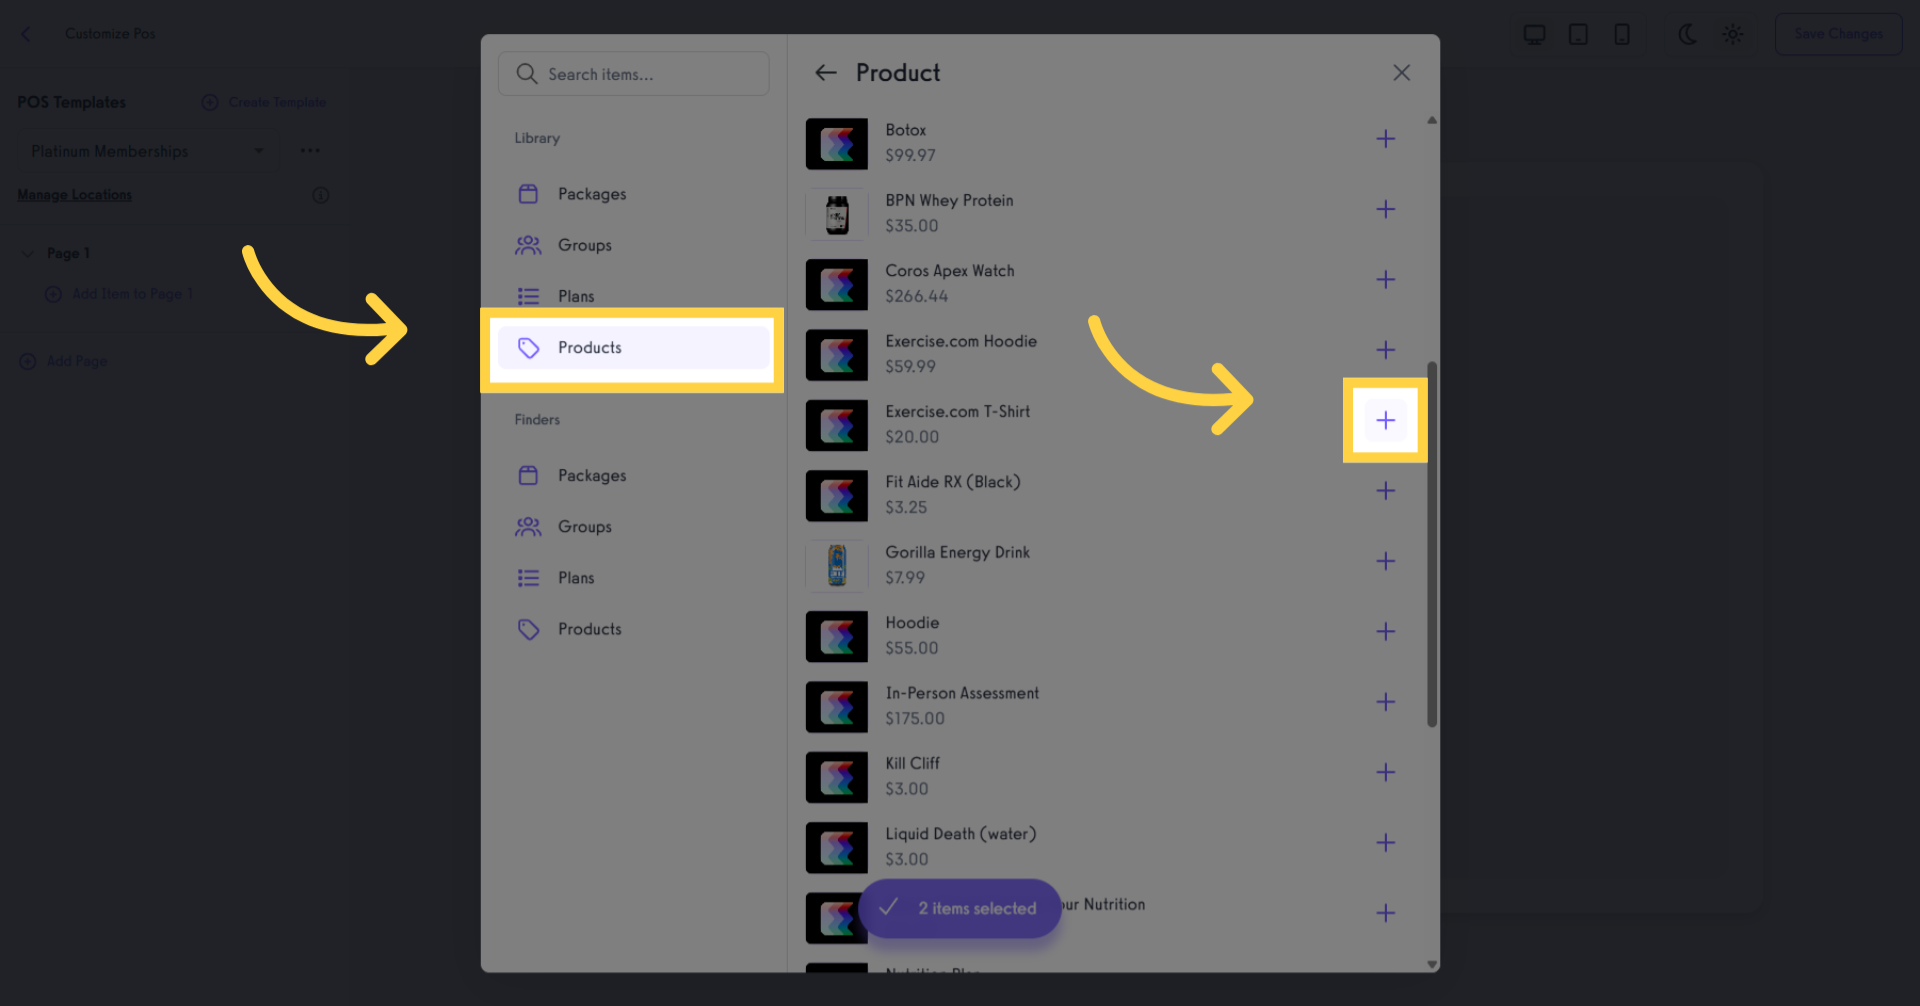
After selecting a product, choose a specific variant or the base product. Click Select This Variant to add it as an item on the POS screen.
Click the selected items in bulk to proceed with adding them to your POS layout.
After adding your items to the POS, they will appear on the screen. Review your layout and click Save Changes to confirm.
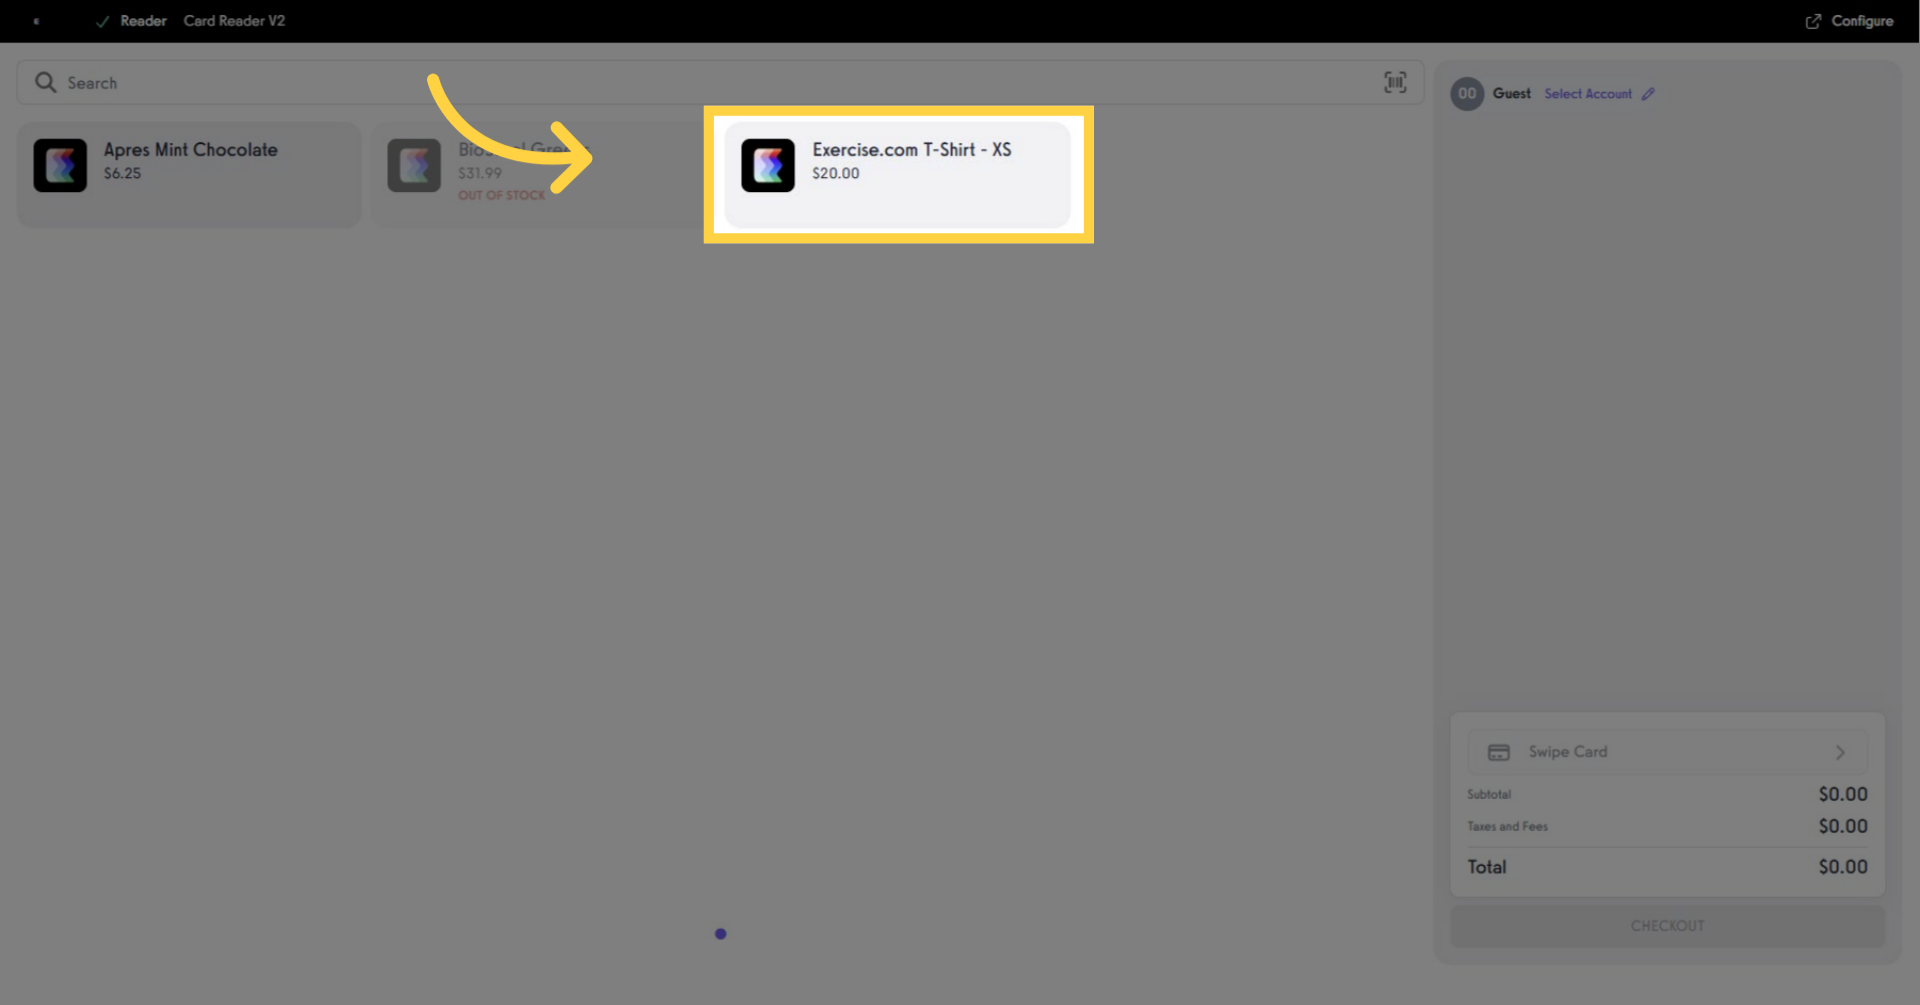
To access the POS, enter your configured POS PIN. If you haven’t set up a PIN yet, you’ll be prompted to create one from your staff profile.
After logging into the POS, select a product variant from the list to add it to the cart for checkout.
You have successfully added multiple product variants to a new POS template, allowing staff to ring up items quickly and accurately. With this setup, your team can manage inventory by variant, track sales performance, and deliver a more seamless checkout experience.
 Support Team